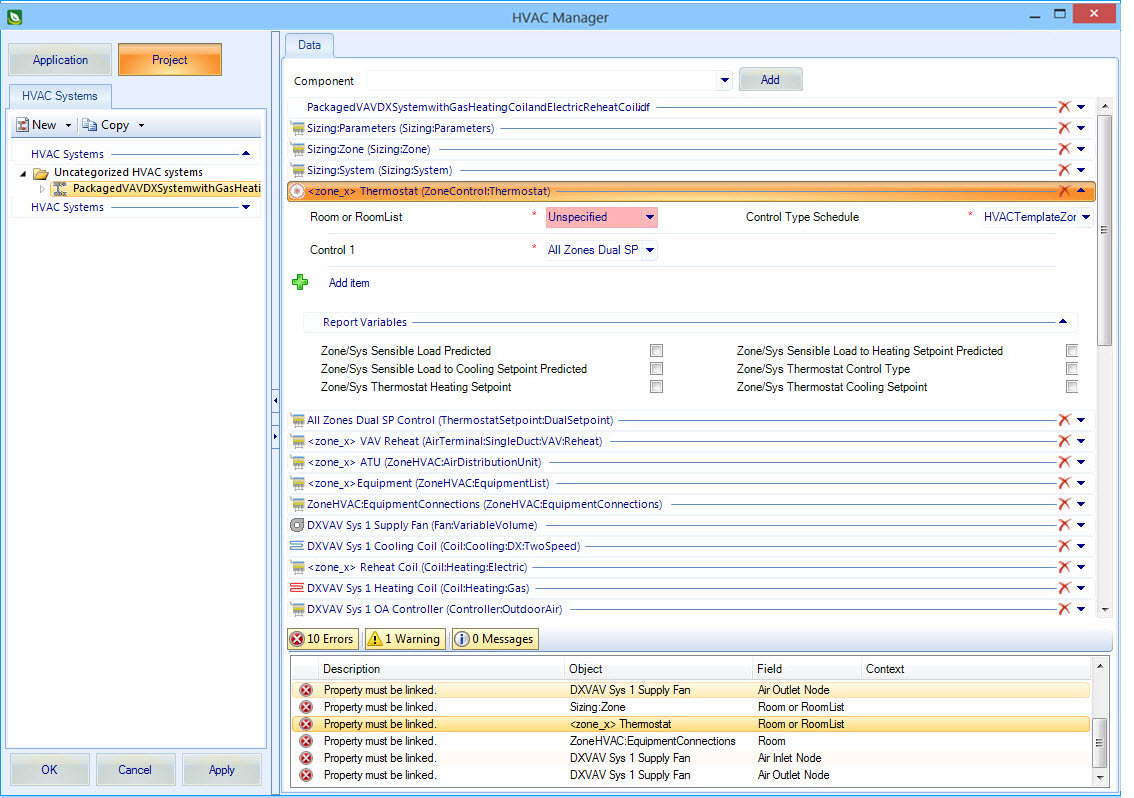
To import an HVAC system idf file and apply it to a zone in your project
-
Select
.
The HVAC Manager opens.
- Click the Project button to ensure the changes you make are saved to your active project rather than to the system folders.
-
On the
HVAC Systems tab
toolbar, click the small arrow next to the
New button.
A drop down menu reveals two menu picks; New and Import.
-
Select
Import.
The Open dialog appears. Browse the disk to where you saved your HVAC system idf file, and select it. Click OK to complete importing the idf file. The imported HVAC system defined in the idf file now appears on the HVAC Manager’s HVAC Systems tab under the Uncategorized HVAC systems folder.
-
Select the imported HVAC system.
A listing of the HVAC components appears on the HVAC Manager Data tab. Each component contains a list of properties.
Tip: Required properties are highlighted and denoted with a red asterisk character. They must have a value specified for the HVAC component to be considered in simulations. These required properties are easily navigated to using the Notifications panel at the bottom of the HVAC Manager. - Expand the first object (importedidfname.idf) in the Data panel, and select a Zone to apply the HVAC system to.
- Click OK to save all changes and close the HVAC Manager.

